I feel something wrong and uncomfortable in the “Nando” space and in the kitchen・・D-san said to me.
In order to solve D-san’s such problems, I decided to visit her home to help her out.
Before Visiting
D-san’s Background
A housewife of 40s. She currently lives with her husband and her high school-age son. The whole family loves sports.
D-san’s Troubles
She feels a stress because of the overflow of things in the “Nando” space.
Her husband puts his coat on the sofa after he comes home.
Her son puts his backpack at the entrance hall after he comes home.
She feels like there is a lot of wasted movement in the kitchen. She is considering of remodeling.
D-san’s Requests
She wants to make・・・
a place in the Nando for her husband to hang his coat.
a place in the Nando for her son to put his backpack.
it easier to vacuum clean.
the kitchen easier to use.
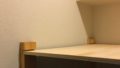
The Day of the Work to Make the Nando Easy to Use
We started from the Nando space.
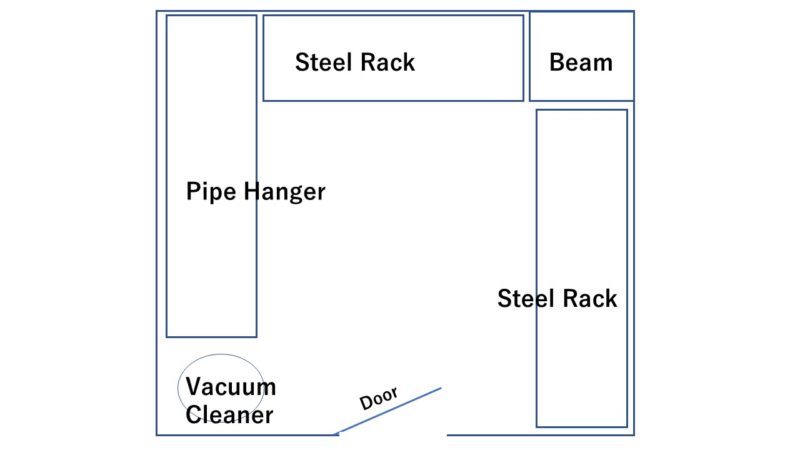
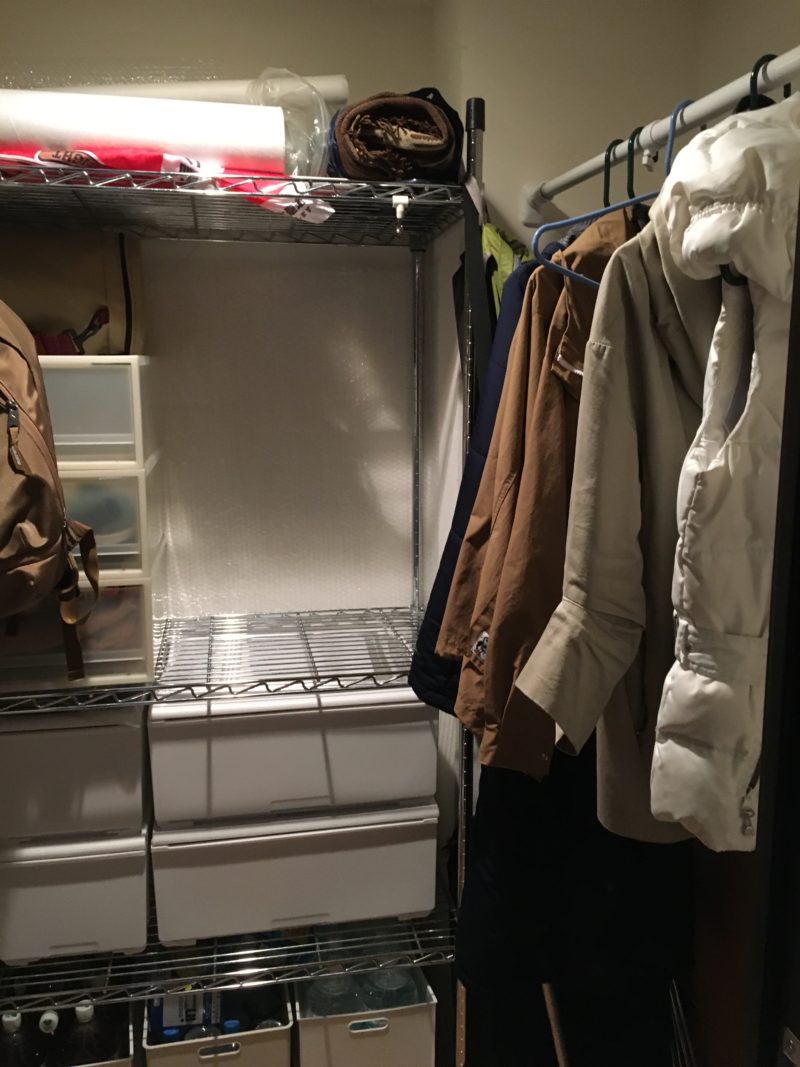
It used to look like the photo right below, but by the day, D-san herself worked hard to make it better like the photo further below.
- The protruding storage cases have been resized to its perfect size and is now much better♪
But there are still some problems!
Problems to be solved
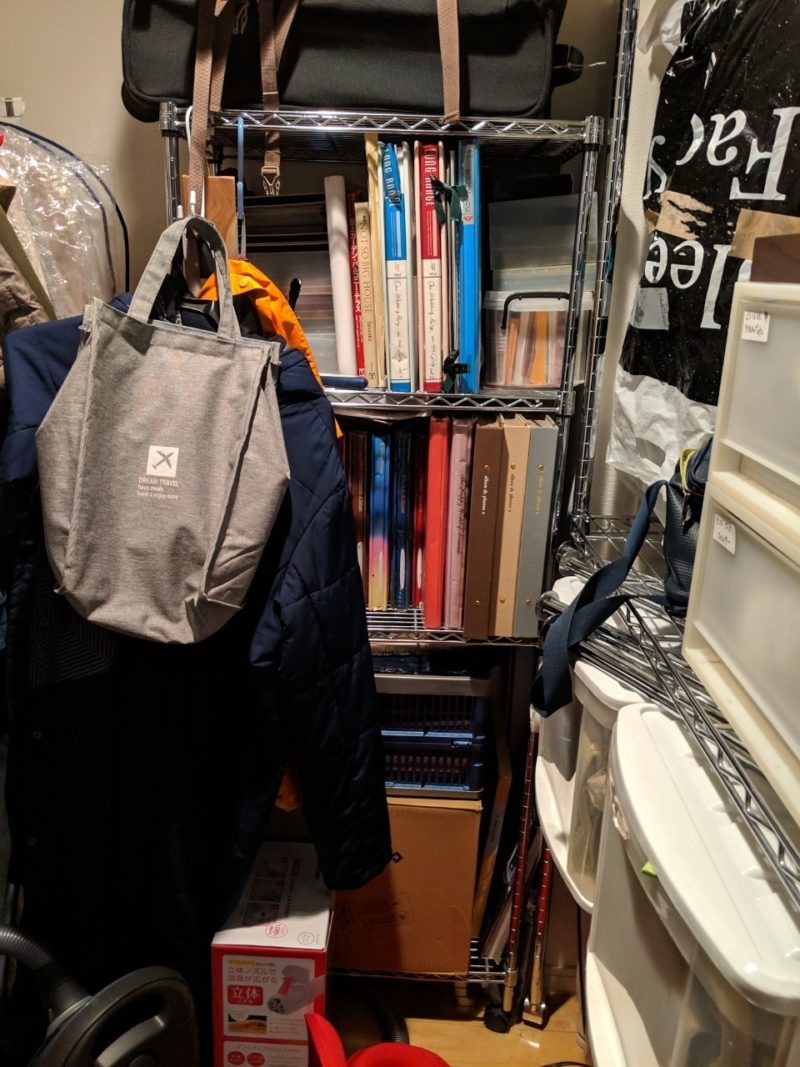
- ▶Hanger Rack on the Left Side
- Clothes are stuffed so tight on the rack → Hard to take out and in
- Storage cases are under the hanger rack → Very unstable
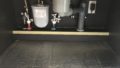
- ▶Steel Rack in Front
- Albums are occupying the easiest place to use
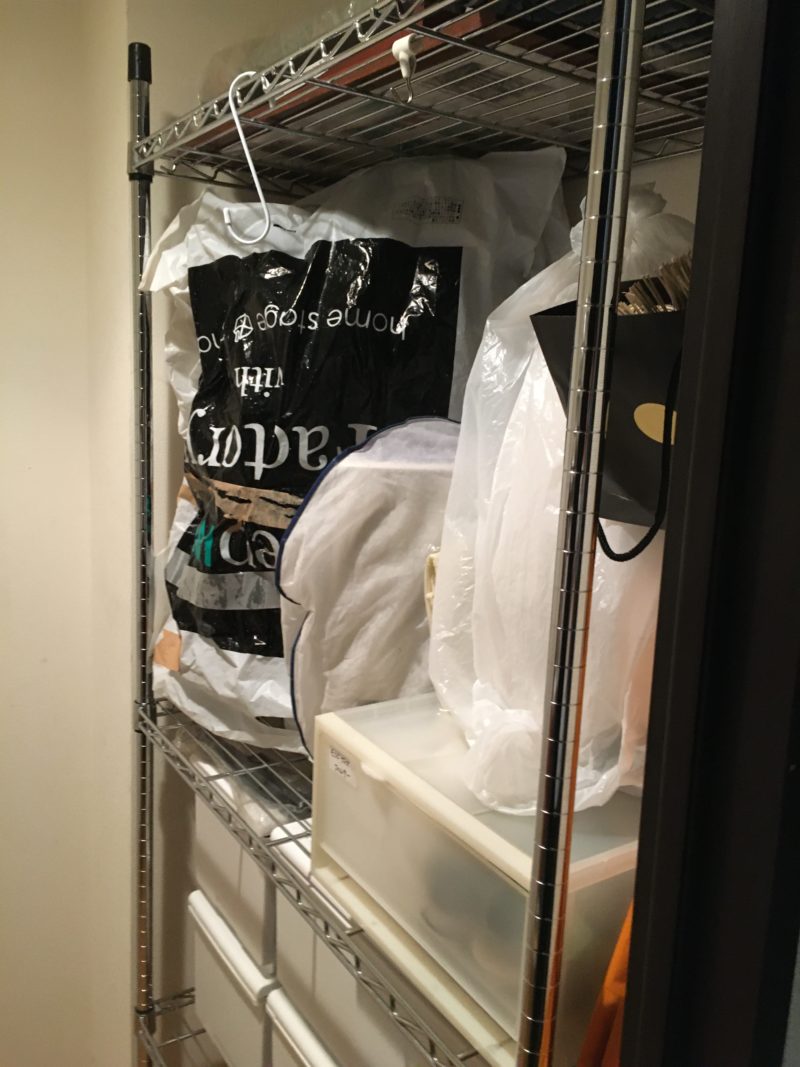
- ▶Steel Rack on the Right Side
- Seasonal items like a Xmas tree and a humidifier are occupying the best place to use
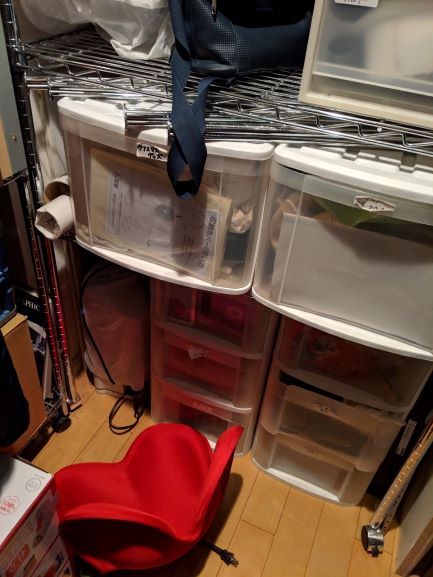
- ▶Space Underfoot
- *D-san has cleared away the space by the day!
What We Did
- We took out the hanger rack first from the Nando to make a working space.
- We moved seasonal items (Christmas tree, humidifier, fan) to the storage space outside the entrance door.
- We decided to buy a new open shelf for the albums in the corner dead space.
- As a result, we changed the layout (from left to right) as shown below
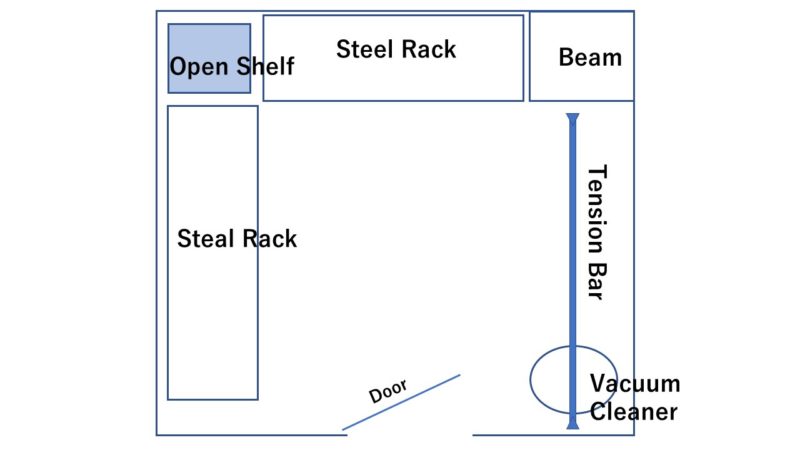
Blue color is the open shelf we purchased on that day.
Right: Changed the steel rack to a tension bar
We got rid of the pipe hanger as it was difficult to use. And bought a tension bar instead, using the beam at the far right.
Now the foot space under the clothes has been created.
A vacuum cleaner was placed in front.
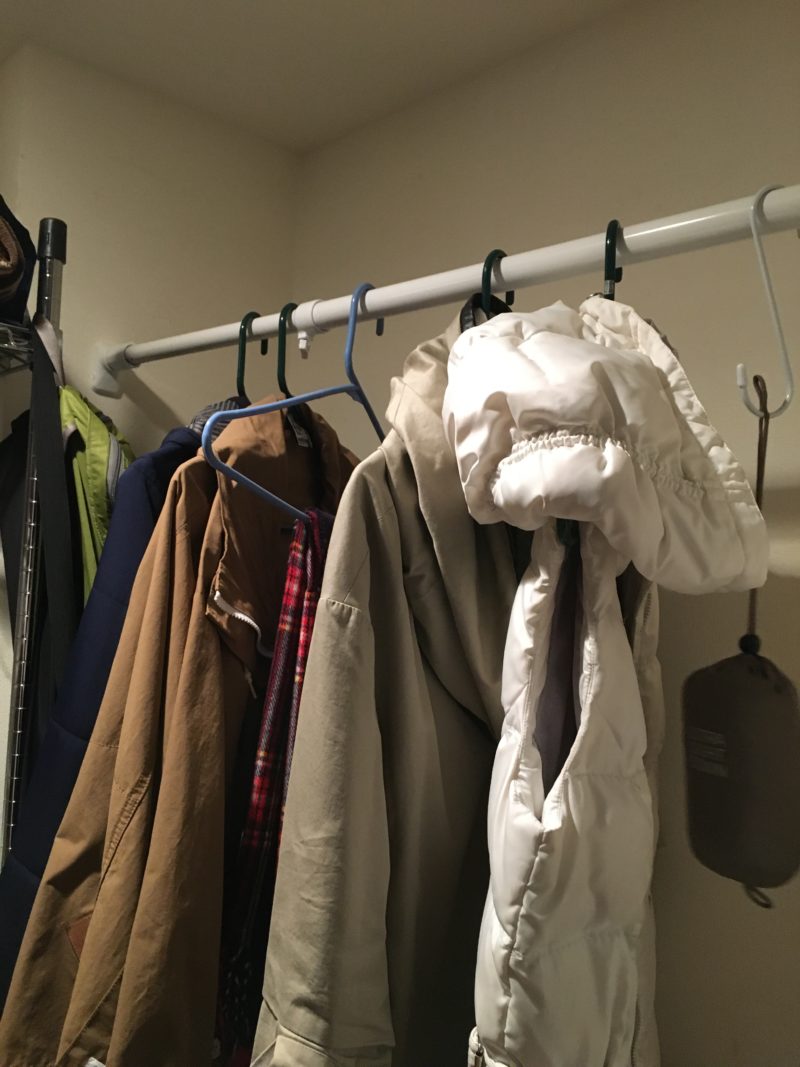
Also reduced the number of clothes by carefully selecting only the ones they wear often.
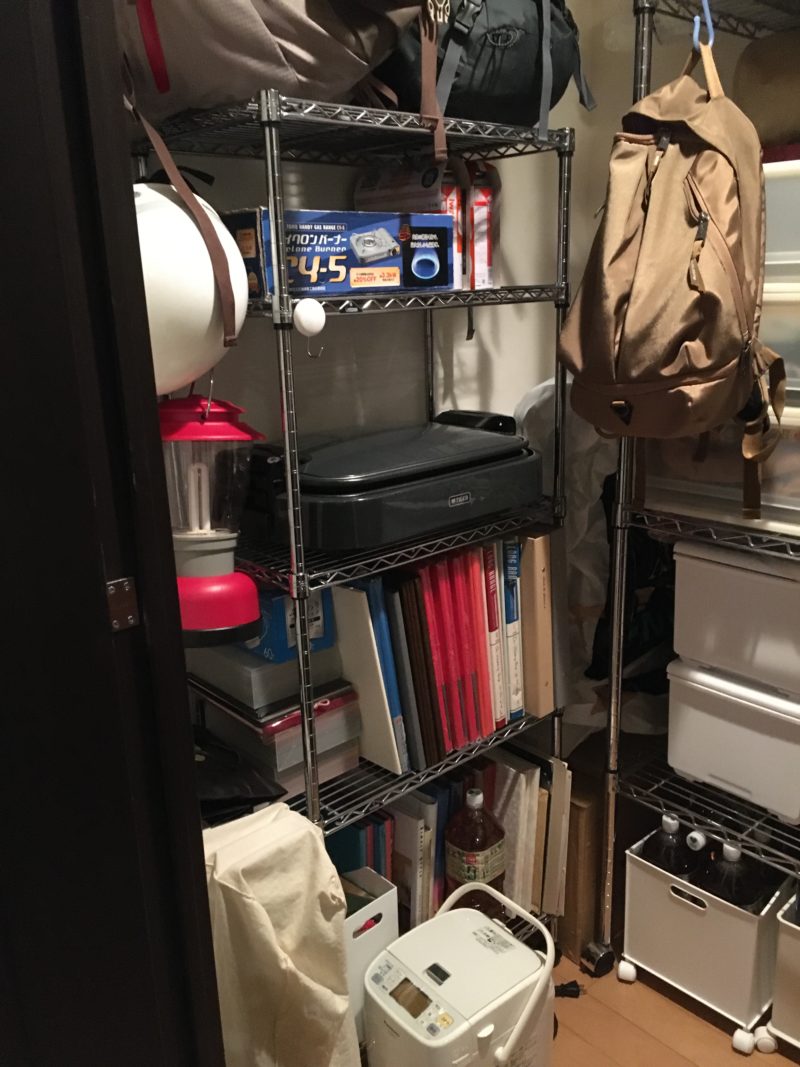
Rack Front: Moved from front to left as a space for albums that are rarely seen on a daily basis
Bought an open shelf for the albums in the dead space in the back left corner. From Nitori, in the 4,000 yen range.
When organizing the photos, D-san can move the steel rack with wheels to the front. Though we bought a shelf, we did not get around to assembling it.
In the space vacated by taking out seasonal items, we brought a hot plate and a portable cooking stove from the kitchen.
Being aware of D-san’s eye level, we put them in a place where it is easy to take out.
Then, we planned to place a spare plate (such as for taco grilling) by buying an additional shelf on top of the hot plate.
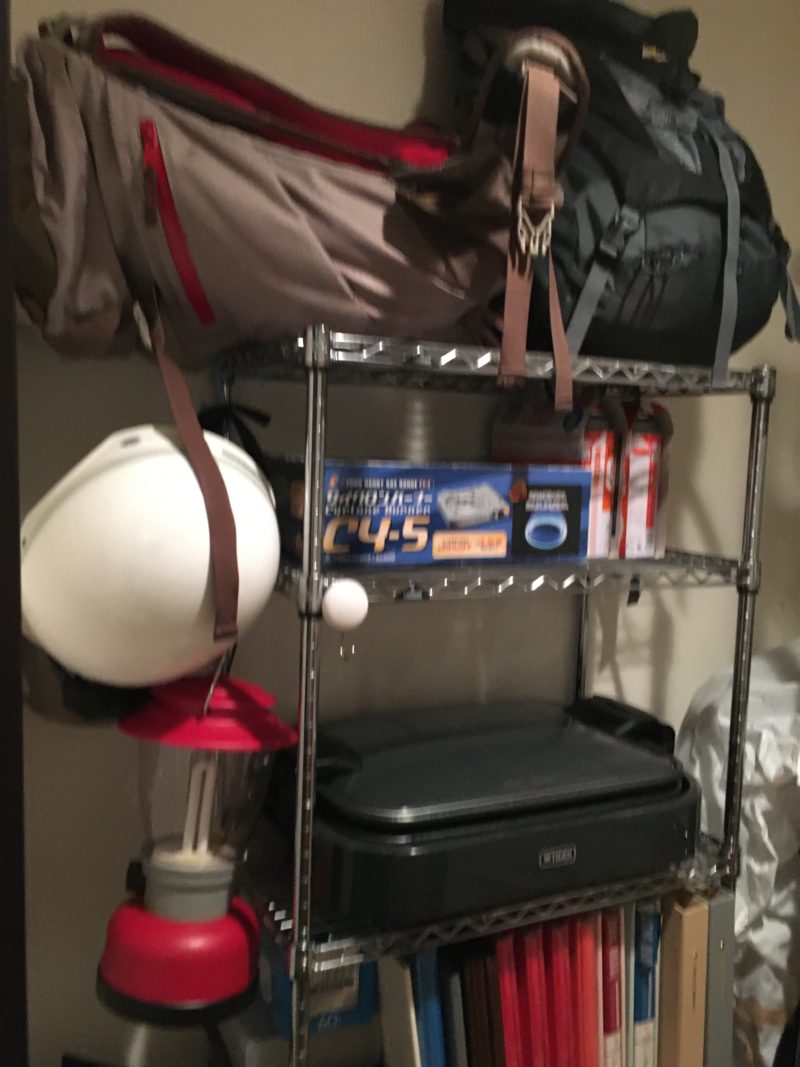
On the top shelf and aside, we placed evacuation backpacks, helmets and the lantern.
At this point, we hadn’t assembled the shelves for the albums yet, so we kept them in the original place. Later, when this space becomes open, D-san is going to put a home bakery machine.
Steel Rack Right: Moved from right to front mainly for her son’s space
The first thing you see when you enter is the space for backpack of D-san’s son.
We put a cushioning material (popsicles) so that the back wall will not be scratched even if D-san’s son throws the backpack.
On the left side, we brought storage cases (of the same type) from various places in the house to store eco-bags and other items.
Bottom row is for containers with wheels to store PET bottles (D-san’s idea)
The second row from the bottom are frequently used items such as carpentry tools ((D-san’s request)
The upper section is paper, such as shoji paper, entrance mat, and other light things.
The final form looks like this

Summary
Improvements
- Wanted to make a place to hang her husband’s coat in the Nando → Easier to hang on the tension bar on the right
- Wanted to make a place for her son’s backpack in the Nando → A new open space in front
- Wanted to make it easier to vacuum clean → The legs of the pipe hangers are gone so easier to vacuum clean
・・・PERFECT!
- Wanted to make the kitchen easier to use → Please visit another article for this.
D-san’s Comments
- I was using the best place for the things that I take out and in only once or twice a year.
- I didn’t have the idea to put the kitchen stuff in the Nando.
- I didn’t even have the idea of throwing away the unusable hanger rack. I should have gotten rid of it earlier.
- Now it is easier to hang up the clothes.
- Just by changing the placement of the racks, you can create a space that didn’t exist before!
・・She seems to be pleased with what we did!
But this time we needed to move something big and heavy. So if you decide to give it a try, please don’t overdo it and ask for someone else’s help.
Now, please continue with the article on improving the usability of the kitchen.
Summary
- First, make a working space
- Take out the things less frequently used such as seasonal items
- Place the things most frequently used in front
- Use the dead space in the back corner, but don’t forget to use wheels for the shelves in front in case of taking out the things from the back
- Put only what goes in the rest of the space and never pack it in

コメント Comments (click below to write in a comment)