
Too Small Nando Space Is!
Nando, storage space, whatever you call it, what you usually see in Japanese apartment is surprisingly small.
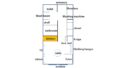
It is usually placed in a narrow hallway. When the door is open, no one can go through behind the door of its narrowness. Also, there are no shelves inside, just a vacant space of about a half size of Japanese Oshiire* (closet).
*In Japan, Oshiire size (1800mm long by 900mm wide) is often used as a gauge.
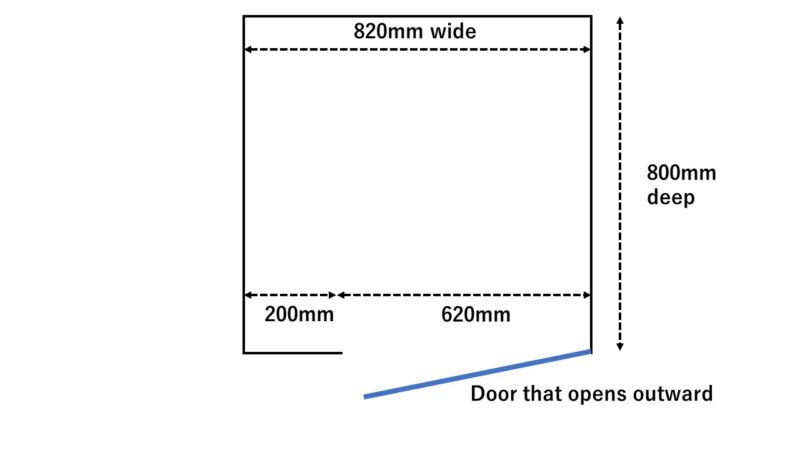
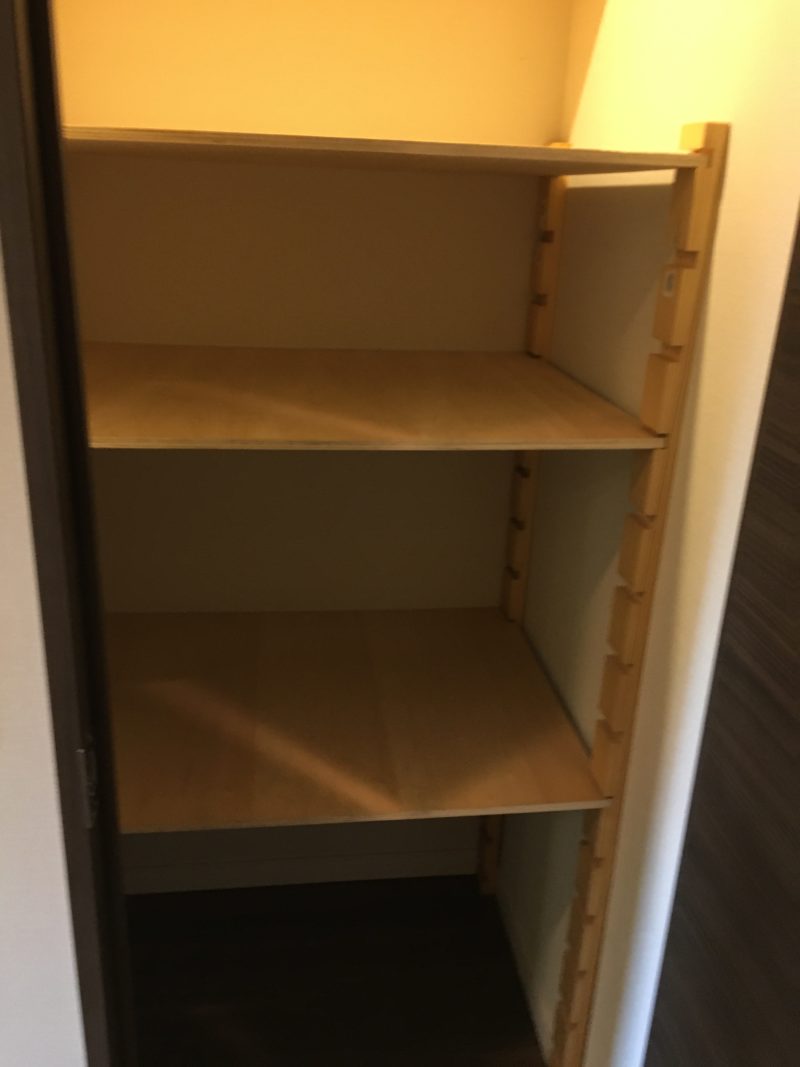
This is the size of my Nando space.
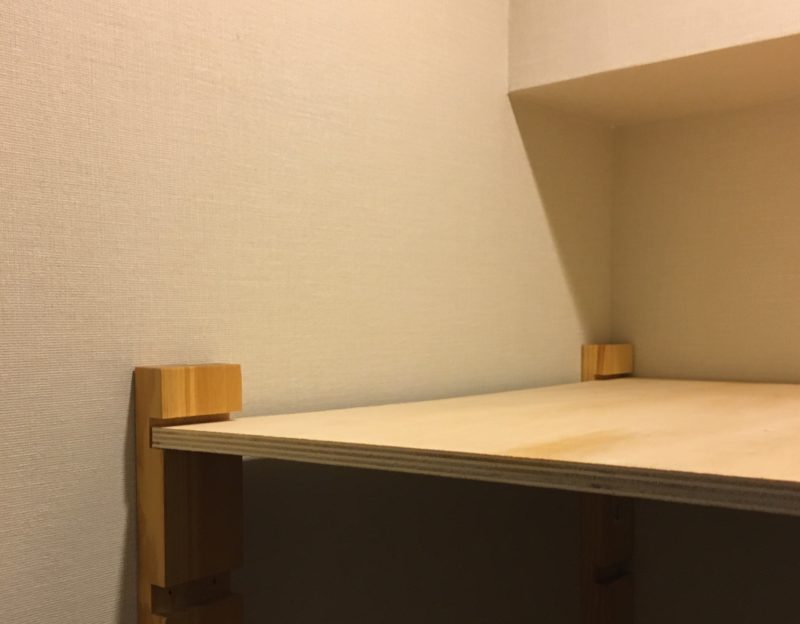
On top of that, there is a beam sticking out in front as shown in the picture above. It’s a far cry from the so-called “walk-in” space.
So I tried a lot of things to make it easy to use such as tension rods, tension shelves, and chrome assembly shelves, but I couldn’t find anything that fit.
Well then, why not making of my own? I did.
I said “make”, but I just bought wood parts and boards, not a single nail was hammered in.
What I Bought
Four Poles
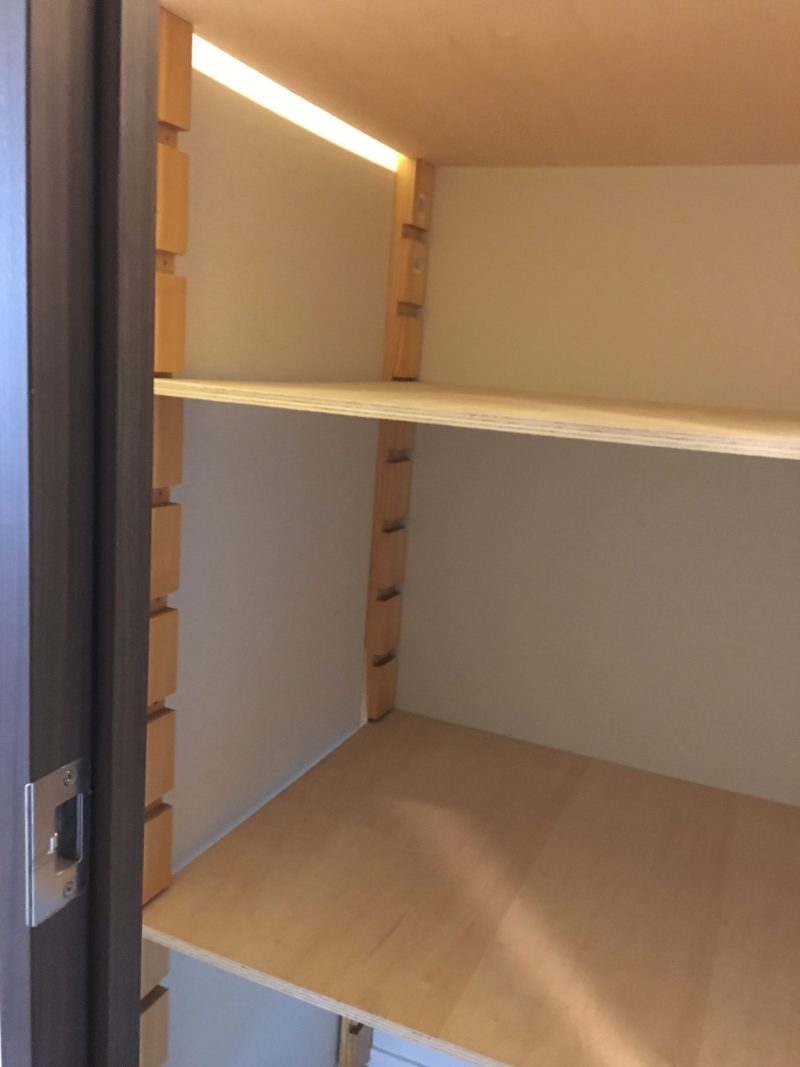
Wooden poles to be pillars in corner, length of 1200mm.
They are sold as “Free Rack Pole” in DIY store. And they are cut into every 100mm from the beginning so that the boards can be inserted at the height of your choice.
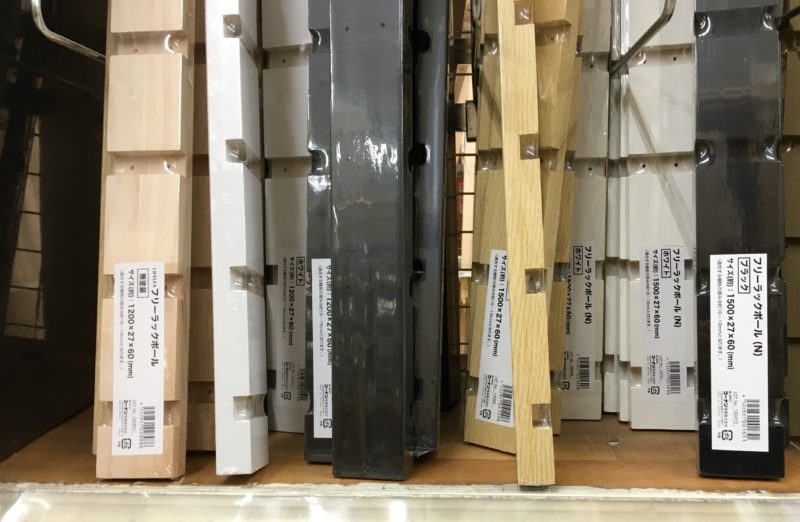
Something like this. The original product from DIY store called Konan. Also available online. A 1,200mm length pole is less than 1,000 yen. Various lengths and colors are provided.
Originally, various shelves like below are sold to fit the poles, and they are to be screwed on from the outside. However, none of the sizes fit my Nando, so I gave up on buying them and decided to have the shelves custom-cut.
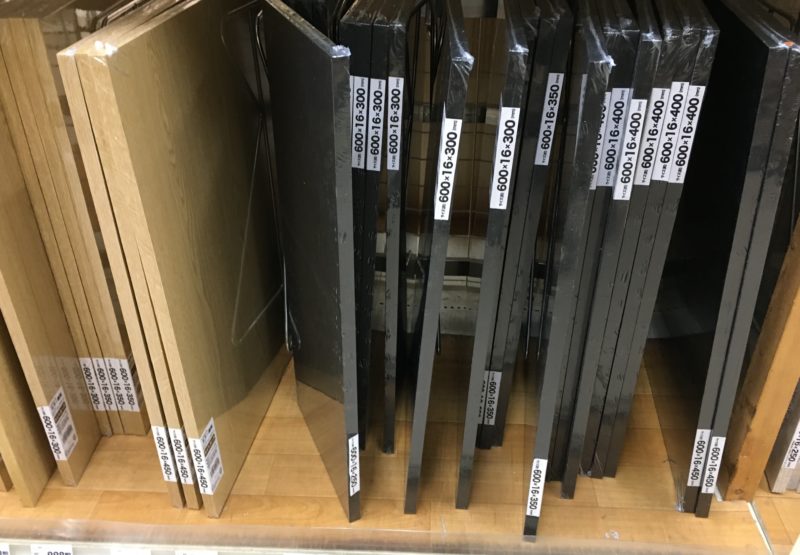
Custom-cut Boards
Because they were not make-up boards, they didn’t look good, but I prioritized usability over appearance. So I chose sturdy material.
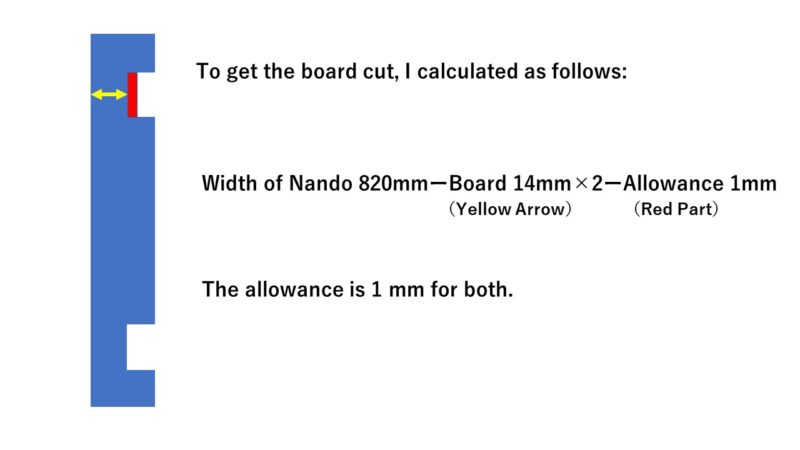
I had three 20mm thick synthetic boards cut at a DIY corner. Here is the calculation. You can order a cut in millimeters. Normally, there should not to be a “gap” between a pole and a shelf when assembled, but I felt uneasy if it didn’t fit since it was measured by an amateur, so I added an extra 1mm for allowance.
Assembly
Originally, the poles and shelves had to be screwed together, but the entrance to Nando was too narrow to assemble inside or bring in the assembled unit. So, I had no choice but to assemble them inside without screws, relying on the balance between the wall and each other.
First, stand the four poles up against the wall. The first two poles should be slightly forward…
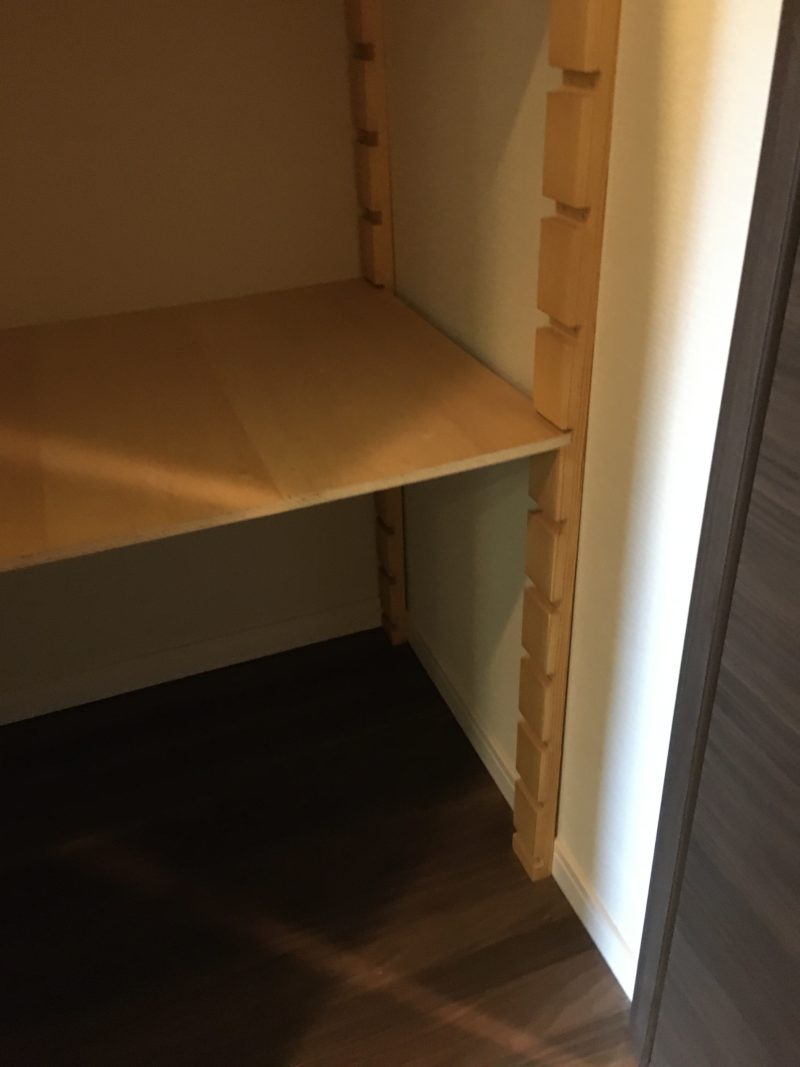
Next, put the shelves tilting at an angle, and insert them from the back of the bottom row. The trick is you have to support each shelf with the pillar in front.
The second and third shelves are inserted in each tier in the same way from the back, and the front pillars are inserted in a good position to complete the unit. I didn’t tighten any screws, but it was quite stable. The completed view is shown below. The poles don’t get in the way so you can use every inch of it.
And Then Storage
I put in a long storage case using its depth.
I put things I use often in the front and things I don’t use often at all in the back.
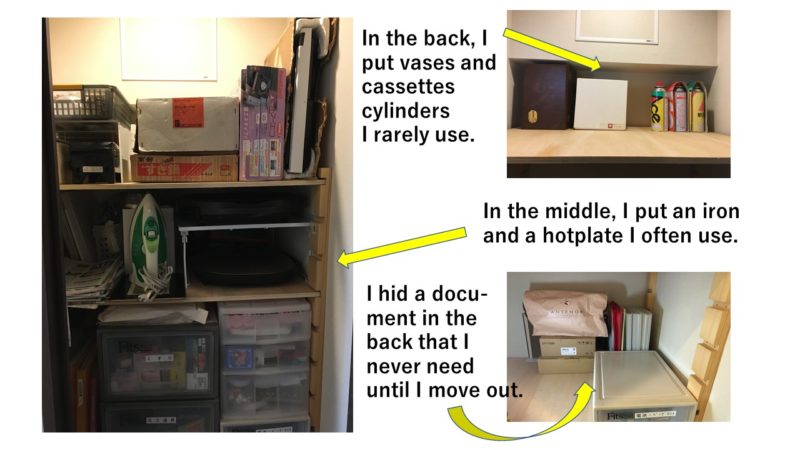
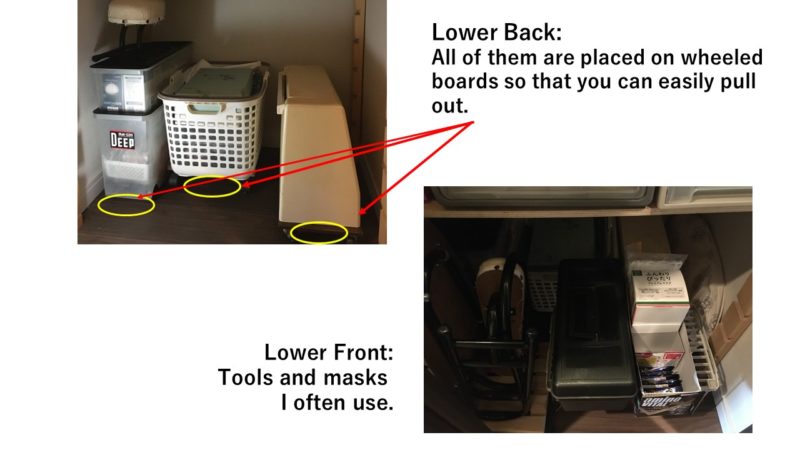
And at the bottom,
It’s done!
But unfortunately, I couldn’t take a picture of the whole completed unit because the hallway was too narrow (lol) to step back. I’ll leave it to your imagination.
*This is just what I did for my Nando Space. Actually, the unit should be properly screwed and used, but this was my last-ditch attempt. So if you have any concerns, please keep this as a reference. However, so far I have not had any problems using it at all. I don’t feel any wobble when taking things in and out. Also, you may want to consider skirting boards in some cases. Please keep that in mind as well.
For an article on wheels, click here.


コメント Comments (click below to write in a comment)