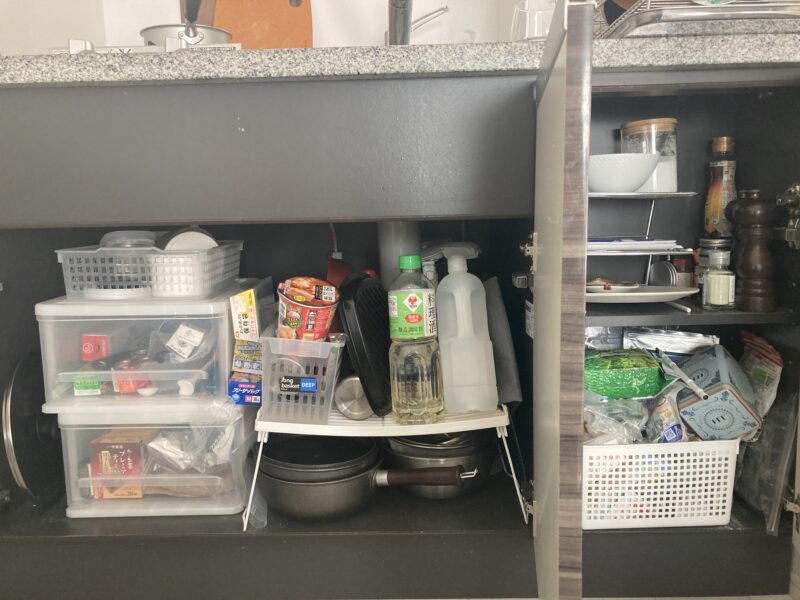
I visited Ms. A’s house again to make her kitchen more organized. Let’s take a look again at the background of Ms. A, which we introduced in the previous article on the closet.
A-san’s Background and Requests at Studio Apartment
Age and Occupation: Office lady of 30s. Working in an apparel company living on her own.
Particular about: She knows she has a lot of clothes, but she can’t just throw them away because of her occupational habit.
Requests: She doesn’t want to add any more shelves in her room, but wants to make the room as clean as possible.
Hobby: Workout, painting. Recently started to buy tableware.
Biggest problem: She has an overabundance of clothes. She wants to do something about closet.←This was solved last time. She doesn’t care much about the kitchen and other places, but she wants to use only the dishes that she really likes.
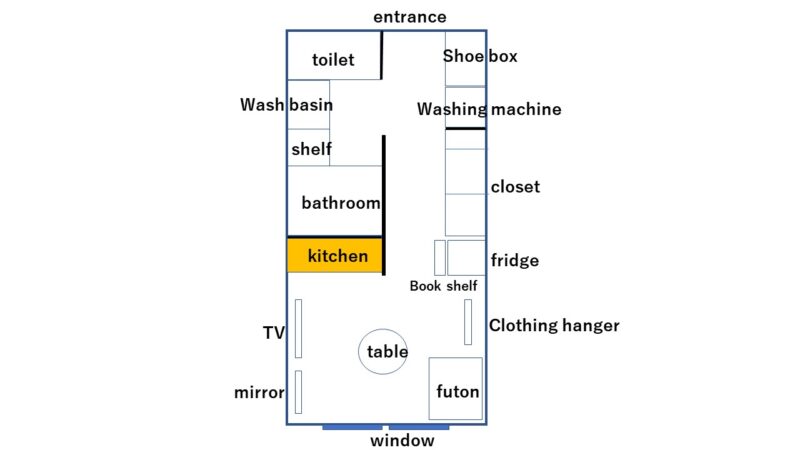
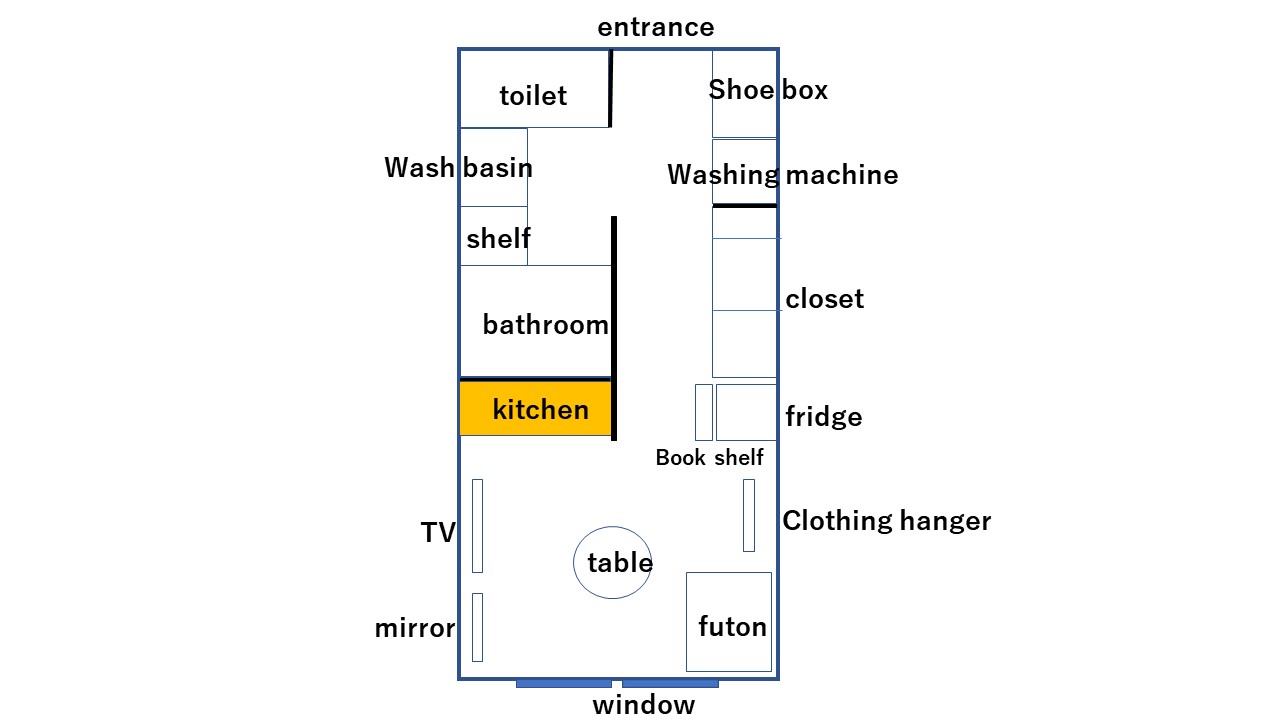
The floor plan looks like this. This time, I focused on the kitchen (the yellow part) and cleaned it up.
Before the job: Current status
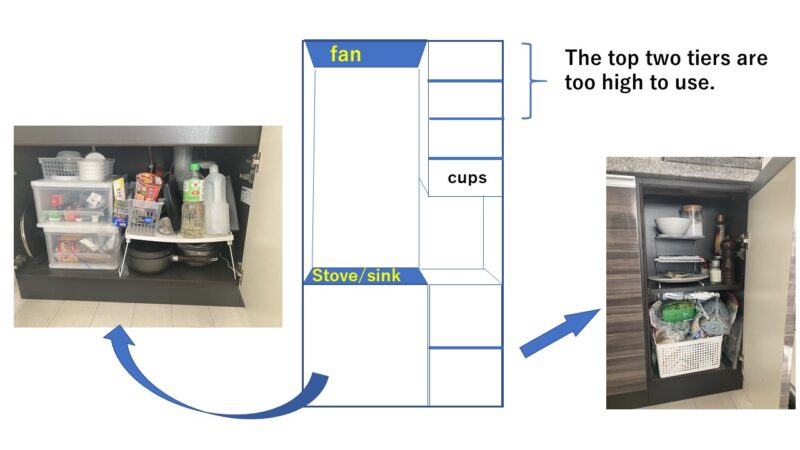
The storage areas are under the sink (see photo below) and 20cm wide shelves at the top with a swing door. The upper part of the shelves is out of reach, so it cannot be used. There are no drawers. The place that can actually be used is only under the sink. However, there is a drainpipe sticking down from the sink, so only the area in front is usable.
What we did
Emptying
Sort by category
First, we took everything out and figured out what’s in there.
Oh, here comes out one after another, dishes, seasonings, pots, cooking utensils, plastic wrap, dry goods, tea, water bottles, etc.
But here again, I found that the categories are mixed up just like I found in her closet. For example, condiments and tea are in the same drawer, frequently used water bottles are scattered here and there, and so on.
Checking the frequency of use.
Next, we checked what Ms. A uses the most according to her daily habit.
- She drinks tea and coffee every day, and she wants to enjoy a variety of them.
- She takes her water bottle to work every day. The size changes by season.
- The pot she uses most frequently is a 22cm diameter one-handed pot. ← almost every day
Work to Put Them Back
After understanding what was inside and what we wanted to do with it, we finally started the storage process.
Of course, we had to clean the inside of the shelves first.
Deciding a rough layout.
- Size and frequency
First, we decided a rough layout by item size and the frequency of use. The taller items such as salad oil and cooking sake are placed on the right side making use of the high space. And with that, we gathered there other cooking condiments, seasonings, soup stocks, etc., which were scattered in three places.
Now, it changed like this.
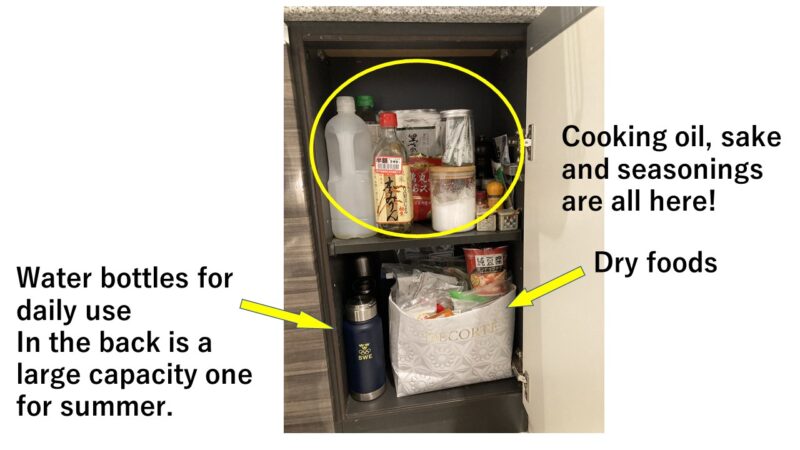
2.Put the things you use every day in the front.
In the space next to dry foods, we placed water bottles in row, so she can change the order according to season.
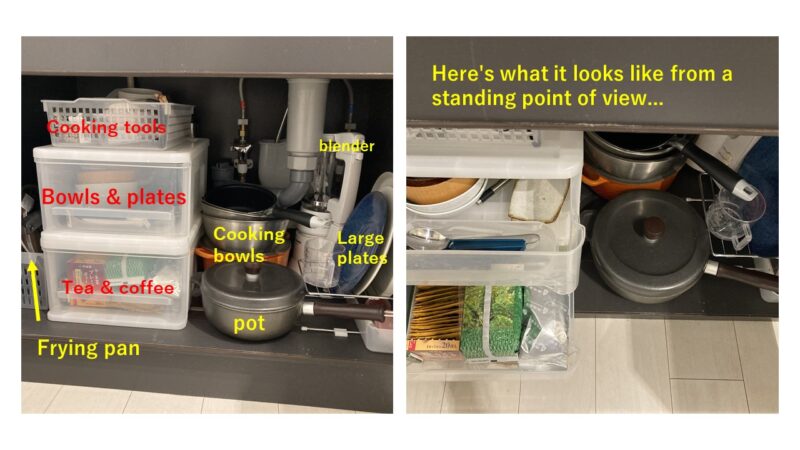
As for a single-handled pot which she uses everyday, we placed it very front under the sink disposing the white folding shelf. Now, she can take it out with one action.
We kept the two plastic storage cases as drawers: one for kitchen tools and cutleries and another for bowls and plates just like a cupboard.
Work to place the remaining items.
Now we needed to figure out how to arrange the remaining items. We kept moving them in and out…
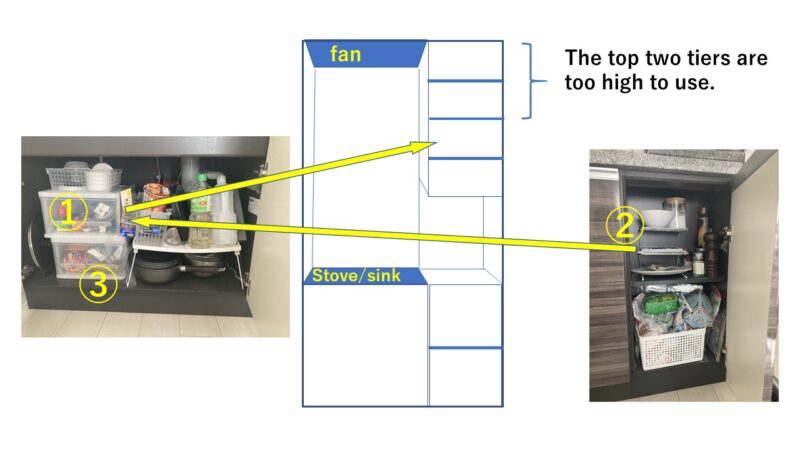
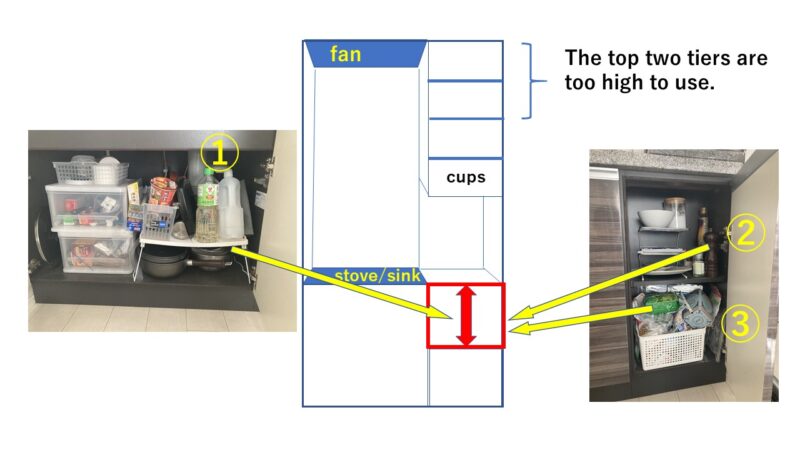
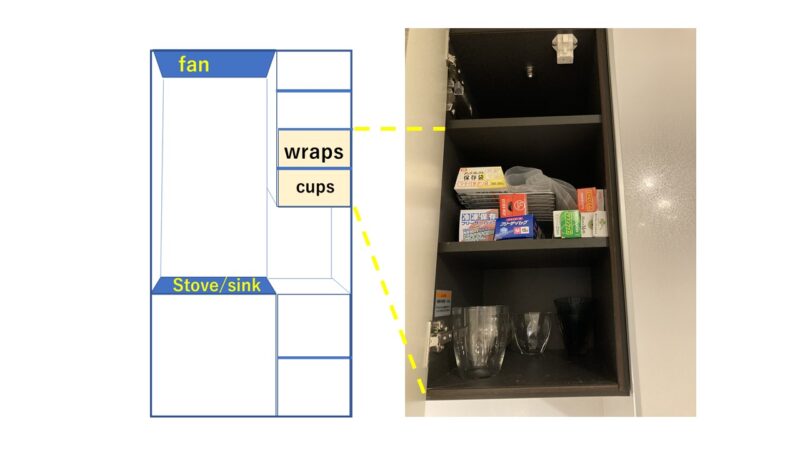
Work ① Moved the wraps to the top shelf on the right under the rule of “put lighter items on top”.
Work ② Moved the dishes from the right side to plastic case.
Work ③ Teas and coffee are gathered and placed in the bottom drawer.
And now, this is what it looks like under the sink.
The final version of the upper shelf now looks like this.
Summary
- Take out the contents and sort them by category.
- When storing, keep the category.
- Check the size and frequency of use to determine the placement.
Voila! Even if you live alone, there are a lot of kitchen goods more than you imagine. But you can make your kitchen more convenient and nice with a little ingenuity.


コメント Comments (click below to write in a comment)